Here are step-by-step instructions for making exams available to students in a Blackboard course.
Exams can be built in Blackboard or imported from programs such as Respondus Exam tool or Test Generator. All exams (tests, quizzes, surveys, and question pools) that exist in a Blackboard course are in the Control Panel > Course Tools > Test, Surveys, and Pools.
The exam needs to be ‘deployed’ in order for the students to be able to take it. Deployed means to link the exam from a student-accessible content area within Blackboard.
Note: Before you deploy the exam, you might want to make sure that the questions are worth the number of points you require and that the total exam points total up correctly. To change point values visit: Change Point Value for Test Questions. And if you need to allow students to upload images as part of their answer, as well as setting other question options visit: Modifying Test Question Options in Blackboard.
To Deploy an Exam for Students:
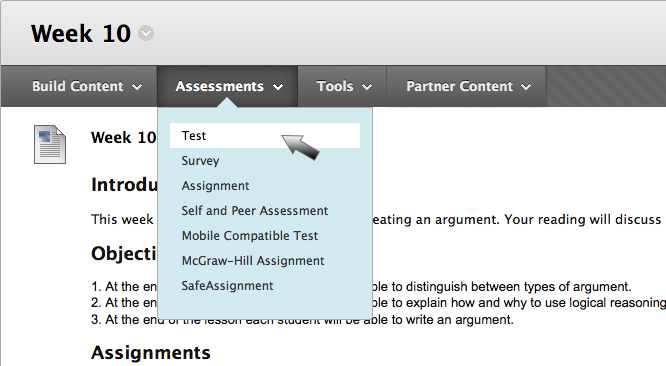
- Navigate to a content area in your course and select Assessments > Test.
Note: If you do not see the content buttons, including the assessment button, check to make sure the Edit Mode is ON.

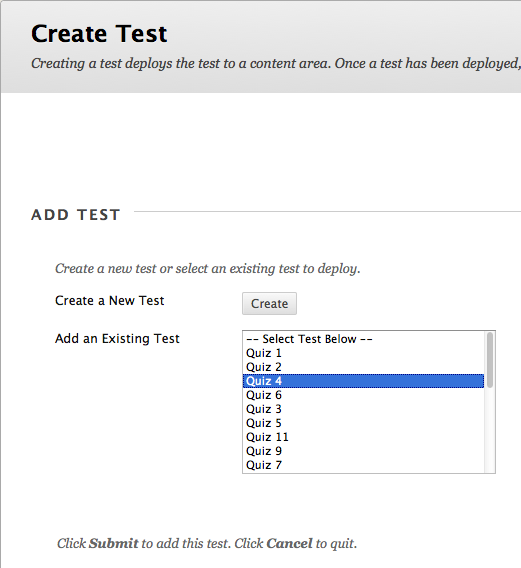
- Select a test from the list and click Submit.
- The resulting page is the list of test options. You do not need to set each one, but the following are important ones to consider under the headings shown (remember that the point value of each question is set in the exam from the Tests, Surveys, and Pools tool):
TEST INFORMATION
- Name: is required
- Content Link Description: Here you can inform your students of how long they will have to take the exam, whether or not it is open book, how many questions it has, and other useful information.
TEST AVAILABILITY
- Make the link available: Set this to Yes. This is a master toggle switch. If this is set to No, then the students will not ever see it regardless of the date and time restriction options.
- Set Timer: This is how long in minutes you want the students to have to complete the test. The Auto-Submit option lets you decide if the test will allow students to run over time or if you want Blackboard to save and submit the test when the timer runs out.
- Display After and Display Until: Let you control when the test link is available to the students.
TEST AVAILABILITY EXCEPTIONS
- Add User or Group: This allows you to alter the availability and timer for students with CEA accommodations.
DUE DATE
- Due Date: This will be marked in the Blackboard calendar and Grade Center. Additionally, you can not allow students to begin the test if the due date has passed.
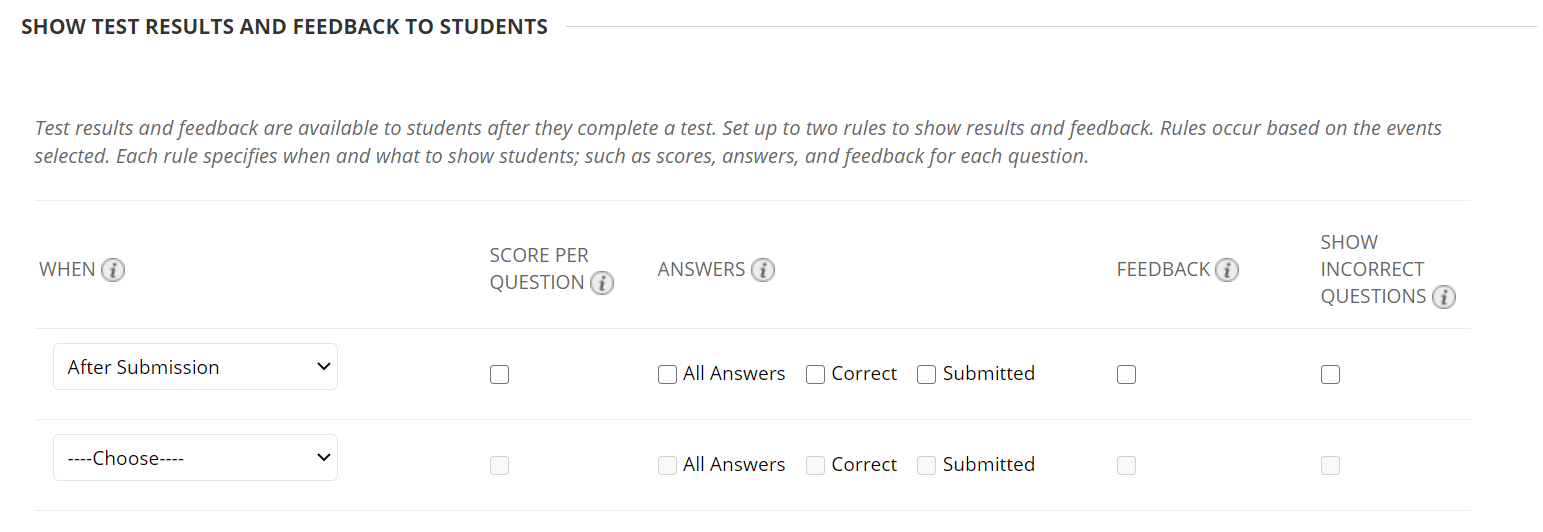
SHOW TEST RESULTS AND FEEDBACK TO STUDENTS
If you do not want students to see the exam questions immediately after the exam, make sure that “After Submission” has NOTHING checked (as in the image below). The students by default will see their score and the test questions when Score per Question is checked. If you want students to be able to see the exam, questions, answers, and feedback, choose “On Specific Date” from the drop-down menu and choose the date. You can then select what you would like them to see from the options.
Note: If you do allow students to submit a test after the due date, the entry will have a needs grading status even if it is set up so that it is graded automatically. You will need to open the attempt (you can deduct points here if needed) and click Submit for the grade to post to the Grade Center.
Select Submit to save the options and make the link to the exam in the content area.
For a complete description of all of the options, please read Blackboard’s Test and Survey Options.