How to add a Post
Creating a new post in WordPress is one of the first things to learn. It can be done either from the Dashboard or from the Admin panel. If you’re logged in and in the back-end, creating a new post from anywhere is as easy as hovering over the Post tab and clicking on Add New. This will automatically take you to a new post editor. You can also create a post from the Admin panel by hovering over the New button and clicking Post. This again takes you to the new post editor.


‘Admin Bar’

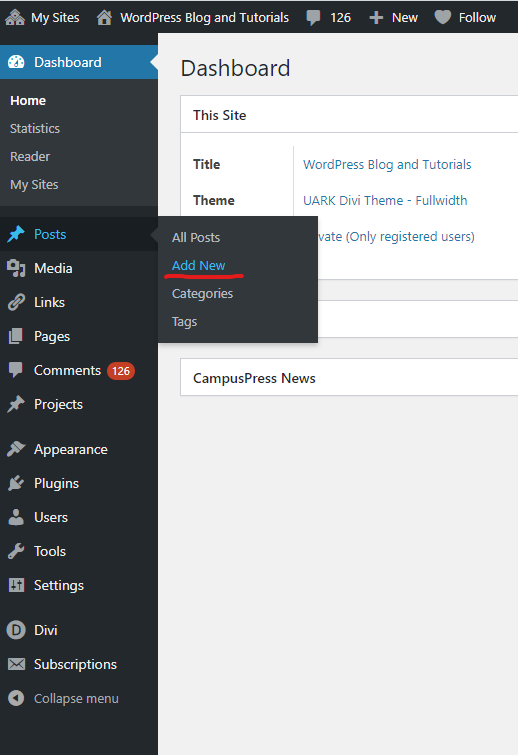
Adding via the Dashboard : Hovering over Posts and then clicking on the “Add New” would take you to the editor Panel.
The Post Editor
- The Default Editor: The Content toolbar that allows you to edit text you like you would in a regular word processing application. Unless you have a very standard post or are experienced with HTML or CSS we don’t recommend this one.
- The Divi Builder: This is useful when you want to do a post with multiple images or videos. Once you choose the number of columns required. You could simply choose the modules for a specific task. Such as the Text module for the Content. Image module to upload images. This one is highly recommended due to its ease-of-use.
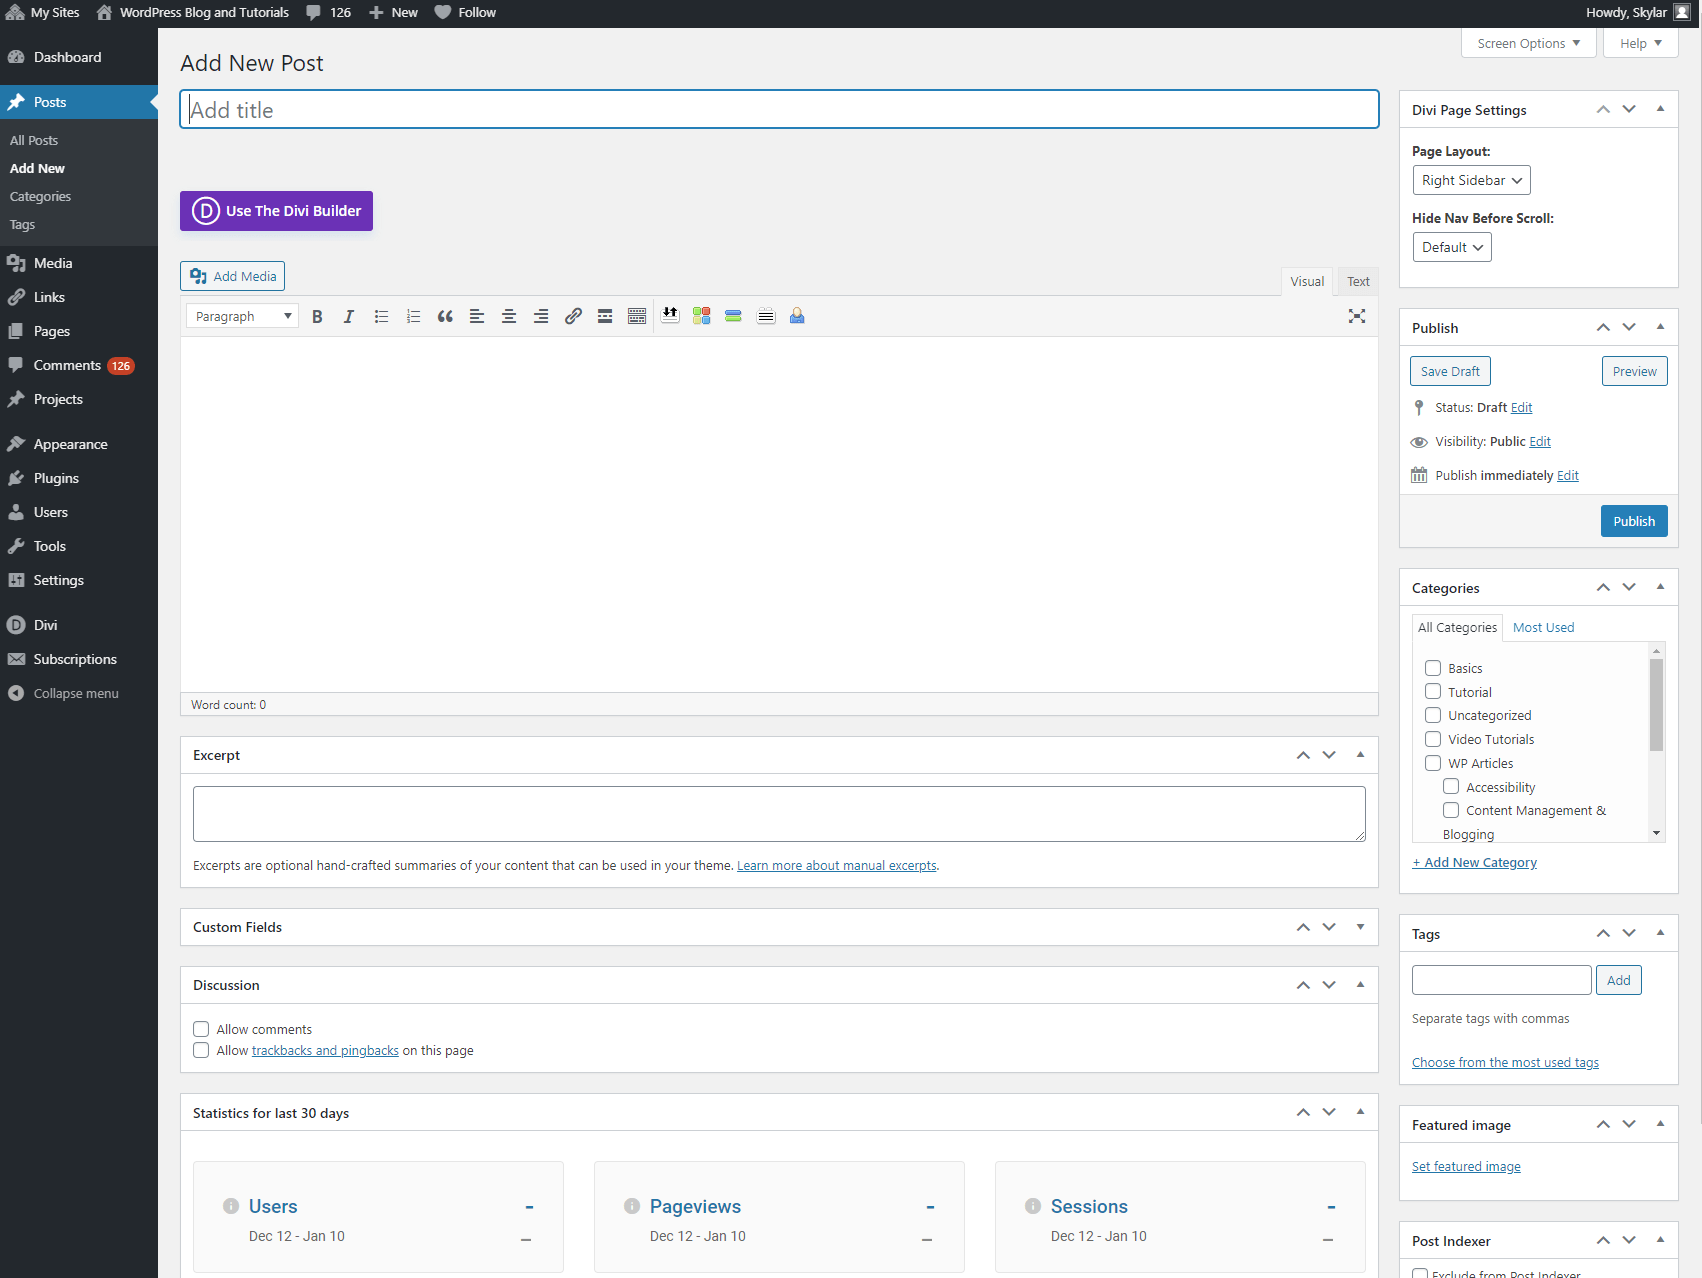
Divi Content Editor: After clicking on the Purple Box labeled “Use The Divi Builder”
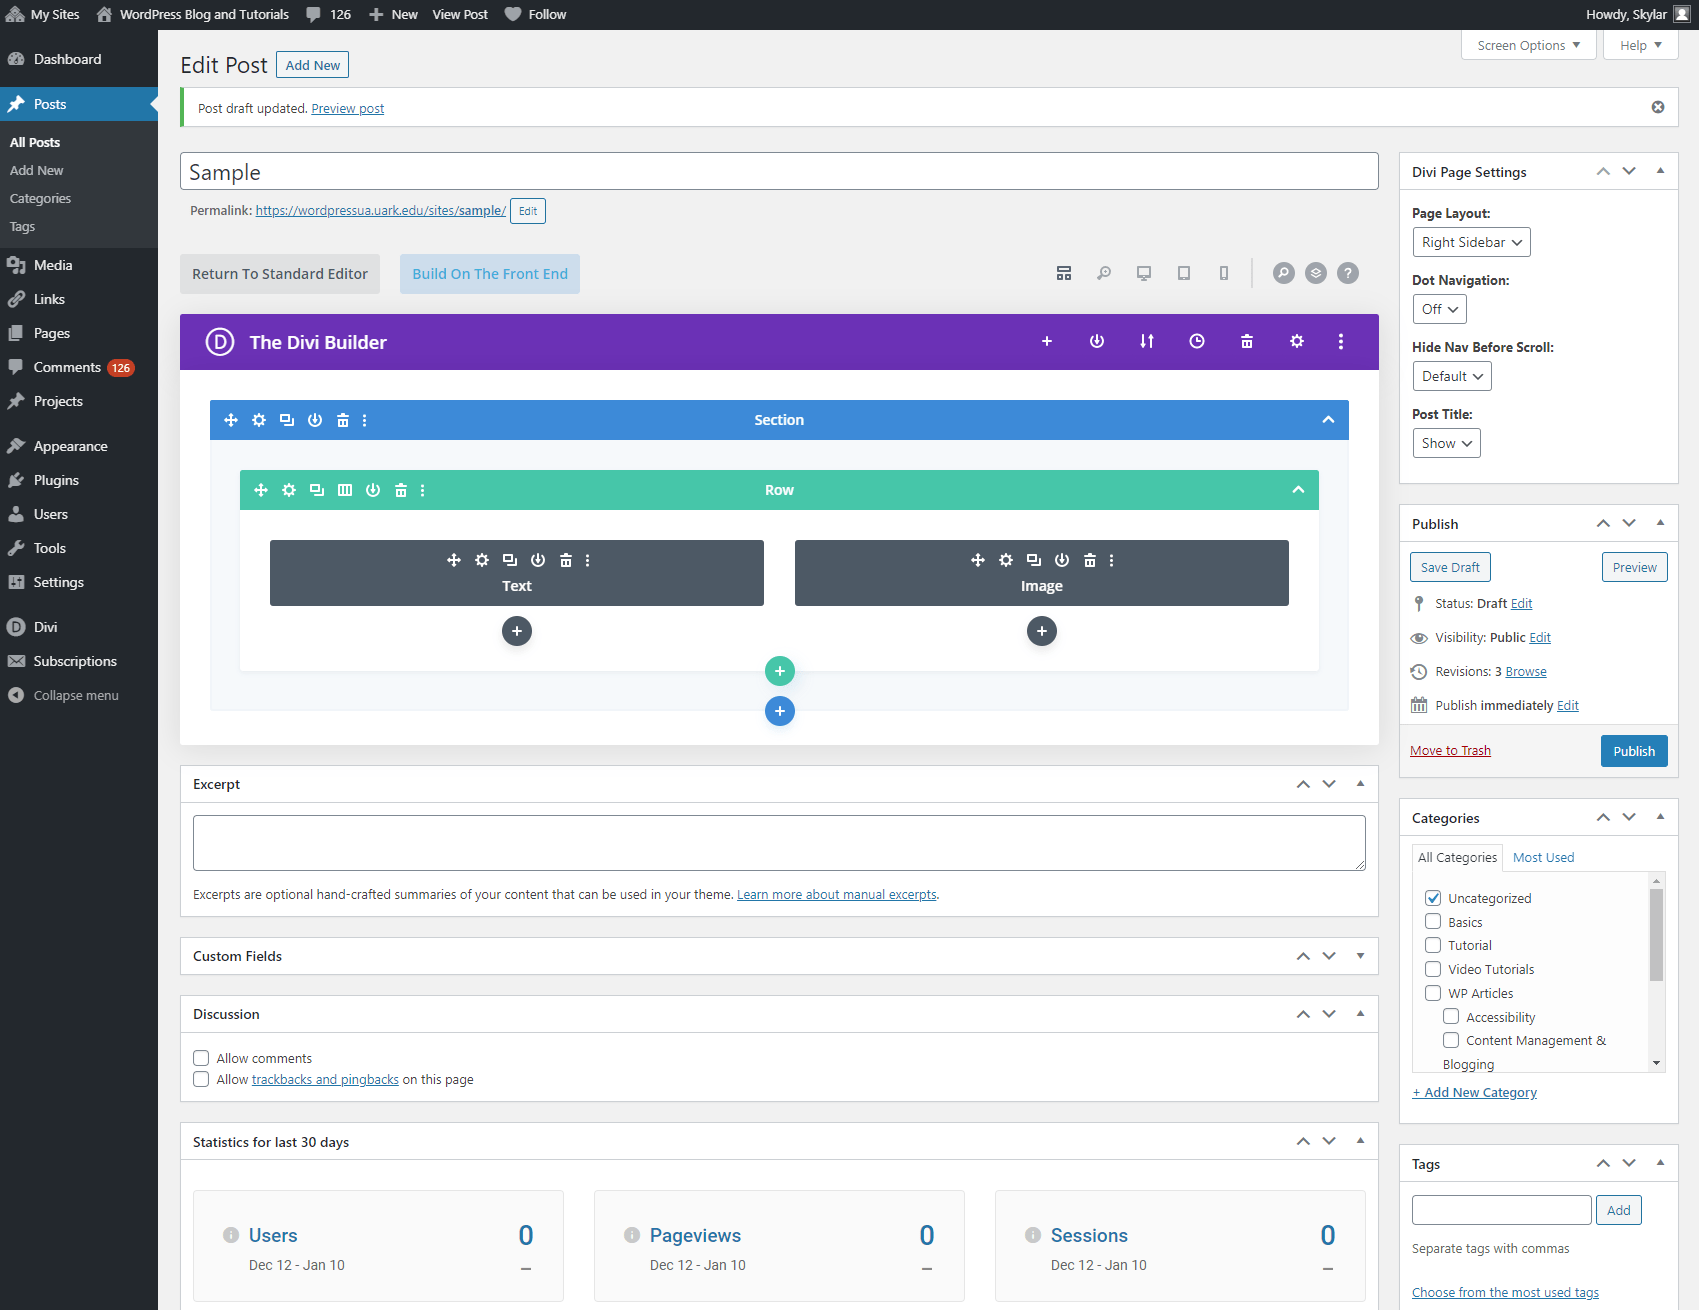
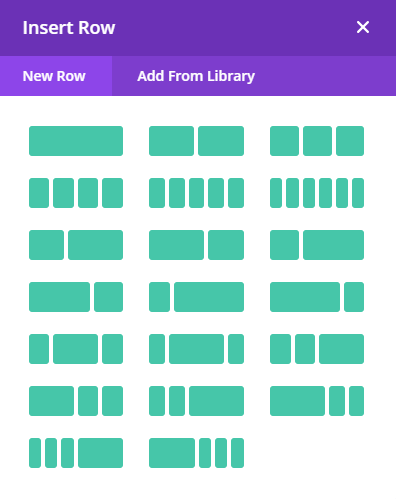
Four Simple Steps to use Divi as your Content Editor. After choosing “Use Divi Builder” the first step is to choose your column structure. Divi offers the gamut when choosing a column structure. From one large wide one to sixths and combinations of sizes.
- Choose number of column required
- Click on the Plus sign (+) icon to Insert Module
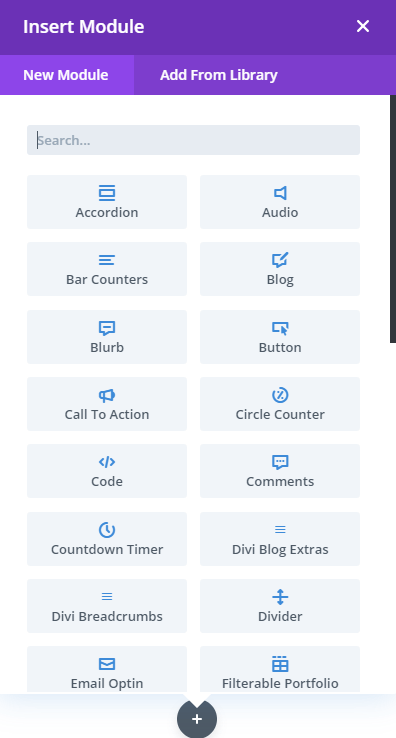
- Finally, choose the Module you need for your content.
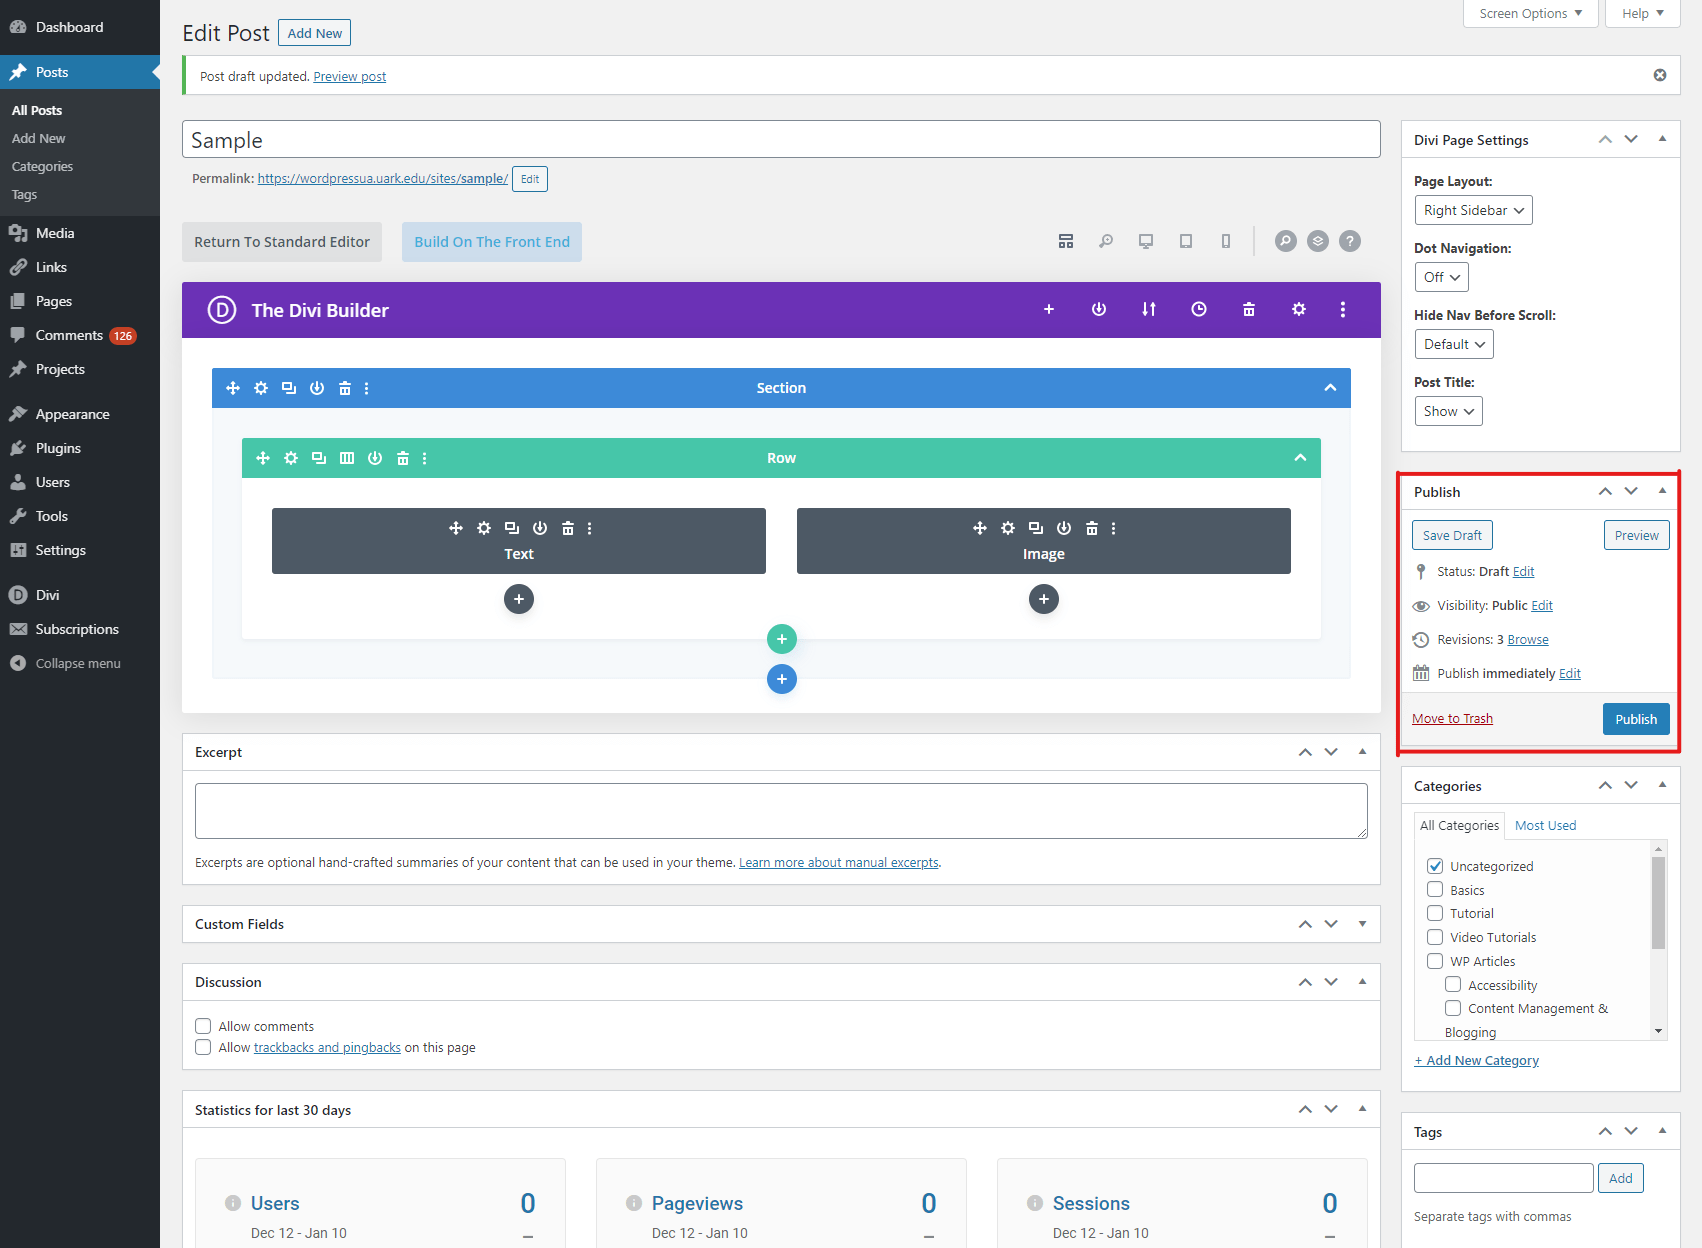
Publish Panel At the right-hand column you find the Publish Panel where the Status of the Post can be changed from Draft to publish. While you are editing the Post and not ready to Publish the post yet then you could save it as a Draft and view the post by clicking the Preview button. A common question among new users is can the post be edited once we have already published it. Yes, it can! You can edit your post as many times as you would like after it is being published.
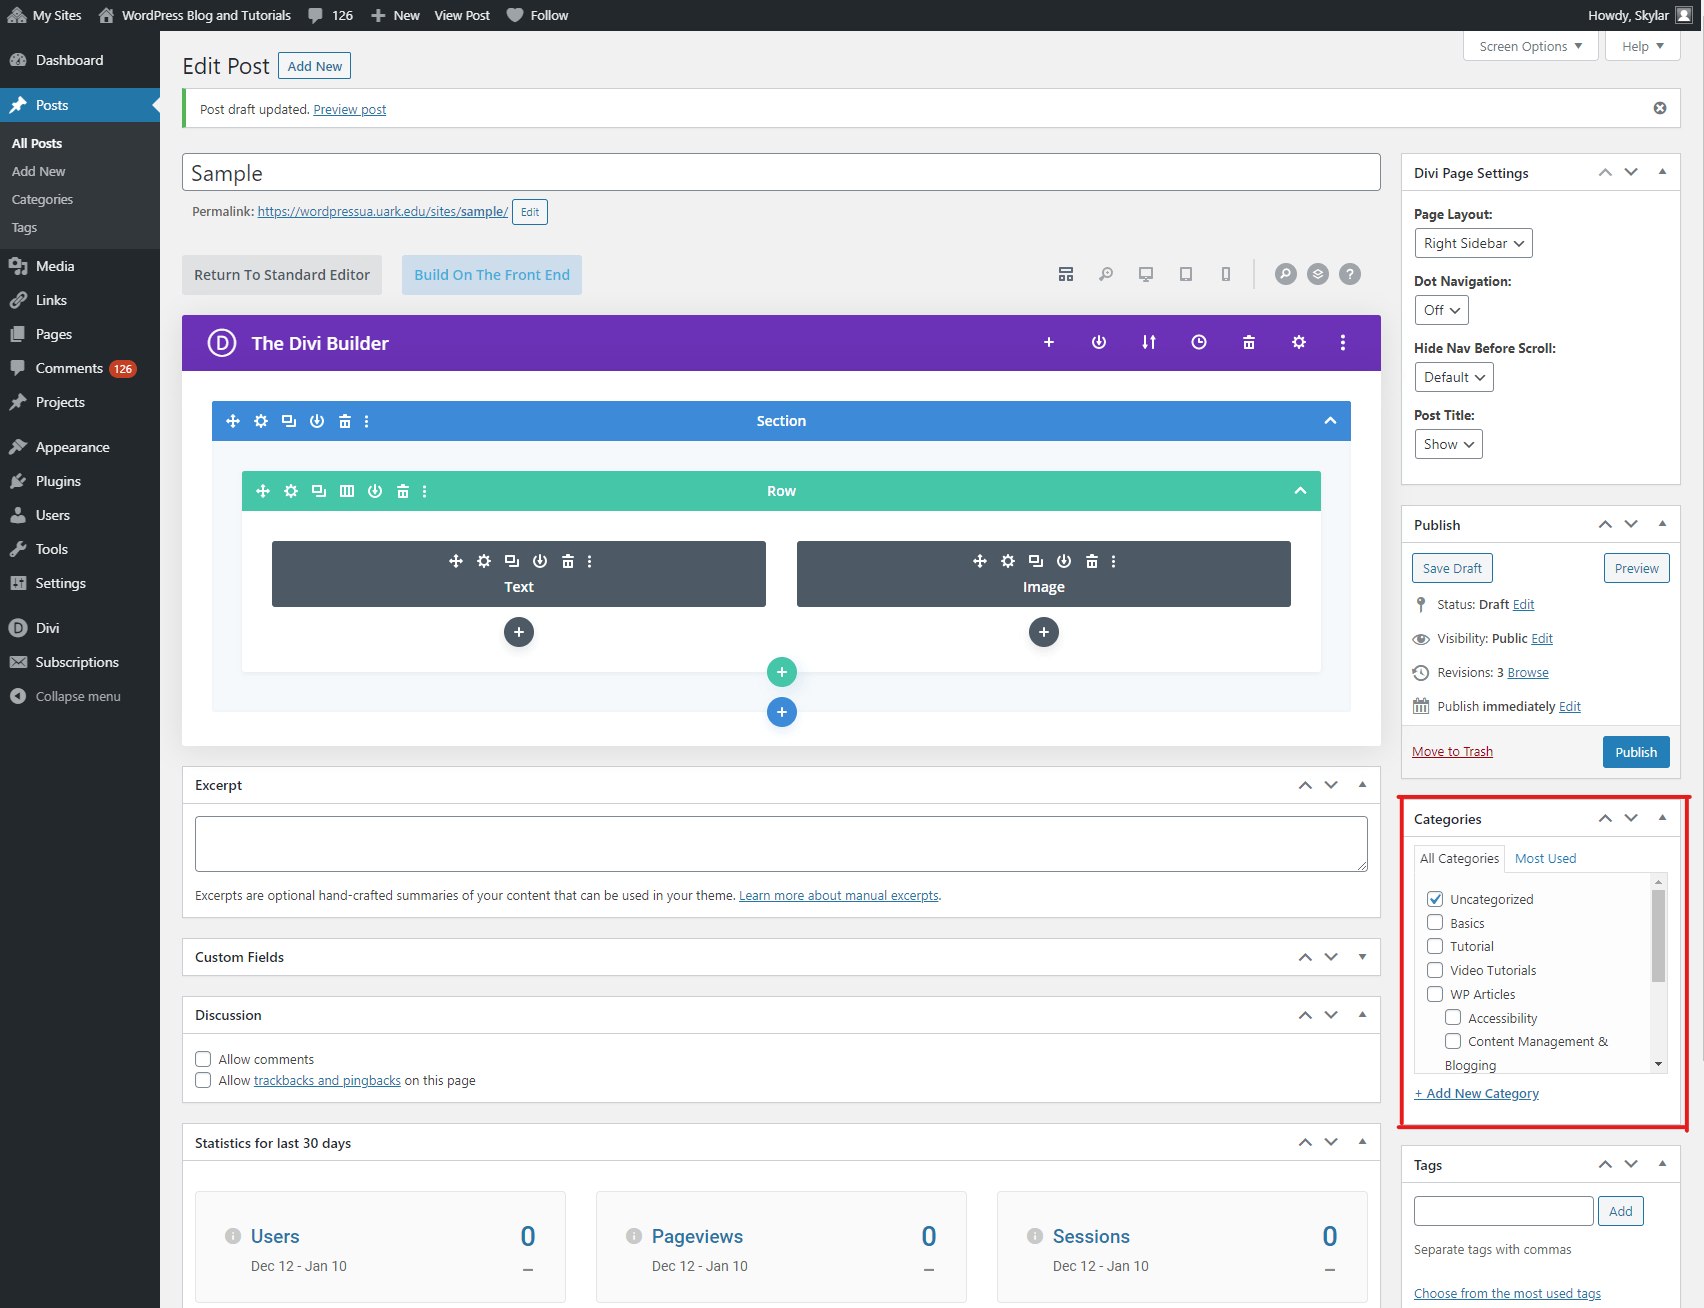
Categories & Tags: “Categories” is the main sorting system for your posts, where you group different types of similar content together. All posts must belong to at least one category and all posts can have as few or as many tags as you like. Putting each of your posts under the appropriate category is really important. If you don’t select a category for a post, it will automatically be filed under the category named, “Uncategorized,” which does not look good. Tags are there to help your readers, and search engines, like Google, figure out the connections between your posts. If you make your tags meaningful, you’ll make your content more accessible.
Feature Image: This is located at the bottom of your right column. Featured Images are used as representative images of your post. Which is placed at the top of your post. Use a Featured Image that captures the theme of your post.

When you are ready, click Publish.